Network Deployment
Using Universal Document Converter as a network printer will significantly improve documentary processing efficiency, including complex tasks. Universal Document Converter installed on server will ease multipage documents and large drawings processing. The process can be set up automatically.
1. Server settings
- System requirements: Microsoft Windows XP or higher, or Microsoft Windows Server 2003 or higher.
- Install Universal Document Converter. The computer will function as a print server. It will rasterize documents and save them as a PDF file, or as image files. Output files will also be saved on the same computer.
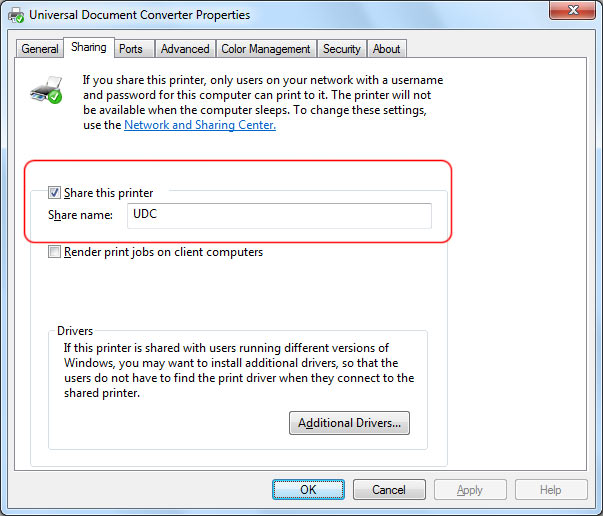
- Go to Devices and Printers folder and share Universal Document Converter. Specify UDC as the network printer name.

Note! To enable network printing, the users must be logged in on the server. If you need to forbid access on the server you can use the Lock Computer option instead of Log Out.
2. Workstation settings
- System requirements: Microsoft Windows XP or higher, or Microsoft Windows Server 2003 or higher.
- If Universal Document Converter is installed on a workstation, and the version number is different from the one on server, click on Add/Remove Programs to remove the local printer.
- If a workstation has Universal Document Converter installed over the network with a version number different from the one installed on your server, go to Devices and Printers window and press the DEL button.
- Restart the workstation if you have removed older versions of the program.
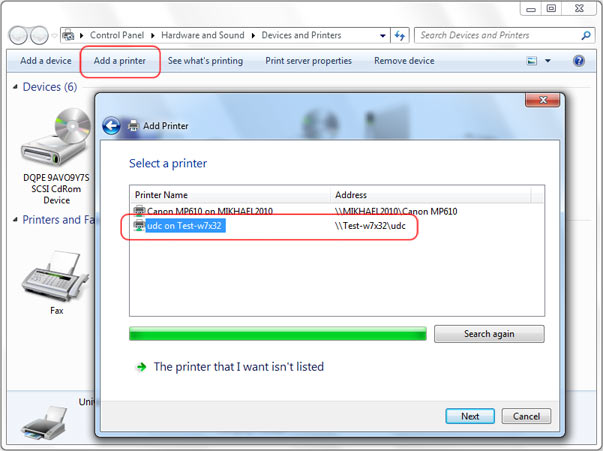
- Install the network printer by pressing Add Printer in Devices and Printers and selecting the UDC network printer located on the server.

3. You can now start your work!


